Dr. Scarlett Cooper, Naturopathic Doctor
  • Home
  • About Dr. Cooper
  • Naturopathic Medicine
    • What is Naturopathic Medicine?
    • Naturopathic Doctor's Oath
    • Guiding Principles
    • Therapies Offered
    • New Patients
    • Children's Health Care
    • Complimentary Consultations
  • Resources
    • Podcasts and Events
    • Blog
    • Recipes >
      • Breakfast
      • Lunch/Dinner
      • Healthy Dessert
      • Dairy-Free
      • Gluten-Free
      • Paleo
      • Sugar-Free
      • Vegan
      • Vegetarian
    • List of Resources
  • Contact

Wholesome Birthday Apple Pie

12/15/2013

1 Comment

 
"An apple a day keeps the doctor away."
Picture
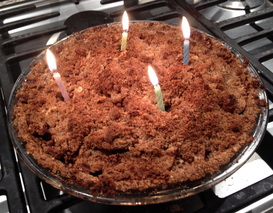
4 candles to represent 64 wholesome years of life!
Last weekend was my Dad's 64th birthday!  I hope he's okay with me revealing his age.  My dad is one of the most influential people in my life, and I was so happy to be able to celebrate his birthday with him this year. 

The last time I was in town for his birthday was in 2009 for his 60th, before I moved out east.  It's certainly been awhile, so I figured I had to somehow make up for lost time.  Solution?  I made him his favourite dessert - apple pie!

Now this isn't just any apple pie.  As I was growing up, the first and foremost requirement of a dessert for dad is that it's sugar-free.  Since apples have some of their own natural sweetness, we're off to a good start!  Next criteria, a more recent realization on his part, is that he does much better following a gluten-free diet.  Having been strictly gluten-free in the past myself, and continuing to be mostly gluten-free now, I felt this didn't present too much of an issue (Especially since Thanksgiving, when I made a fantastic pumpkin pie with the Sweet & Salty Spiced Pecan Crust from Oh She Glows - this really boosted my confidence in making gluten-free pie crust!).  The final bit of criteria for my dad's birthday pie was for it to be dairy-free; not essential for him, but important for me so that I could enjoy it with him!

So, a sugar-free, gluten-free, dairy-free apple pie?  Is this actually going to resemble apple pie when it's done??  I wasn't too worried about it.
Picture
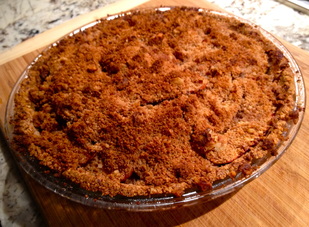
Sneak peek: fresh from the oven!
As for apples themselves, the old adage goes, "An apple a day keeps the doctor away."  How much truth is there to this statement, anyway?  Actually, apples are rich in antioxidants, phytonutrients, and dietary fibre, and may reduce the risk of cancer, hypertension (high blood pressure), diabetes, and heart disease.  They are also protective against neurotoxicity and stroke, and may help to lower LDL ('bad') cholesterol.

One additional note - apples are an important fruit to consume organic, as they rank highest in pesticide residue of all produce, according to Environmental Working Group.  To read my posting about pesticides on produce, click here.

Enough on the health benefits - let’s get started!  This recipe is adapted from Jules’ Fuel (blog of a nutrition consultant, life & health coach); when I saw that the crust featured ground nuts instead of gluten-free flour, I knew we were off to an excellent start in both the taste and texture departments!

The crust was the first task.  This nut crust features ground almonds as the main ingredient, and an egg to hold it all together.
Picture 
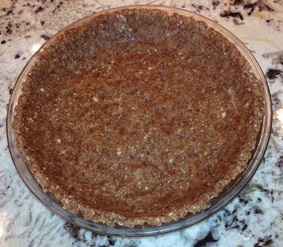
'Pat-in-the-pan' pie crust, gluten- & grain-free version!
Crust Ingredients:

2 cups of almond flour

1/8 teaspoon salt


1 egg
2 tablespoons coconut oil, melted

Combine almond flour and salt in a large bowl.  Add egg and melted coconut oil and mix well to form dough.  Press dough firmly and evenly into the base and sides of a 9” pie dish.  Using a fork, poke a few holes into the crust before baking.  Bake at 350 degrees for 10 minutes.

Next step – the juicy, spiced apple filling.  No wonder this is dad’s favourite dessert!  I did some research into the best apples for apple pie, and honestly, for the most part it seems to be up to personal preference.  For this pie, I decided to use a combination of Fuji (my favourite apple for eating out of hand) and Pink Lady.  Both are sweet, juicy, and delicious.  Other apples that do well in pies are the classic Granny Smith and Honeycrisp (another of my favourites!).  It's best to avoid apples with flesh that breaks down during baking, such as McIntosh and Red Delicious.  It’s hard to go terribly wrong with your apple choice, but these general guidelines will help to prevent a mushy pie.  If you’d like a more in depth discussion of choosing the best apples for pie, read here.

Picture
Filling Ingredients


4 large apples
1 tablespoon vanilla
 extract
2 tablespoons lemon juice

2 tablespoons coconut oil, melted

1 tablespoon cinnamon

1 teaspoon ginger
1 teaspoon nutmeg
1/8 teaspoon salt

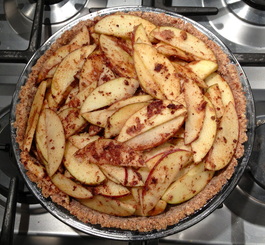
Cut apples into thin slices, or smaller if preferred, and place in a large bowl.  Health tip:  Don't peel your apples - most of the fibre and antioxidants are in the peel!  Add the remaining filling ingredients and mix well to coat apples evenly.  Layer apple mixture evenly in the pre-baked pie crust.

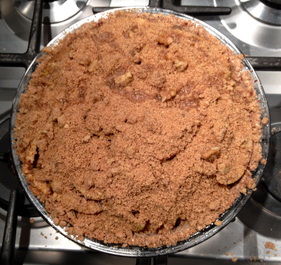
And the glorious finishing touch – crumble topping!  This is my favourite way to complete a pie crust, as it takes advantage of the best of apple crumble and traditional pie crust.  Having this crumbly mixture on top adds incredible flavour and texture, and truly is the perfect finishing touch to any pie.

Picture
Crumble Topping Ingredients 


1 cup coarsely ground walnuts

1/4 cup coconut flour
½ teaspoon cinnamon
1 tablespoon honey (optional)

Process walnuts in food processor or magic bullet, and mix with coconut flour and cinnamon.  Sprinkle the topping mixture on top of the filling, and add a drizzle of honey evenly on top, if desired.

Picture
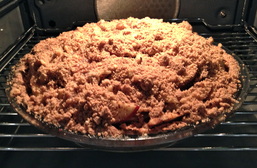
In the oven, already looking good!
I drizzled honey on less than half of the pie - I didn't notice it made much of a difference to the flavour.

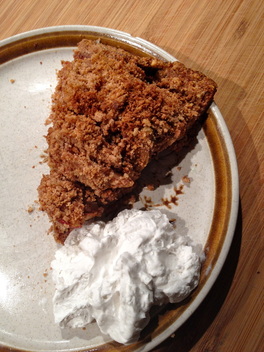
Bake at 350F for 1 hour.  Allow to cool briefly and serve hot with coconut whipped cream. 

Don’t forget the candles if it’s Dad’s (or anyone’s!) birthday!

Picture
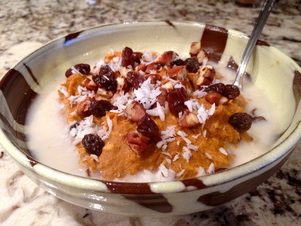
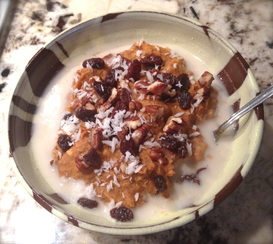
Ready to dig in and enjoy!
Coconut Whipped Cream

2 cans coconut milk, refrigerated for 24 hours or at least overnight
1 teaspoon vanilla extract
1 tablespoon honey (optional, or to taste)

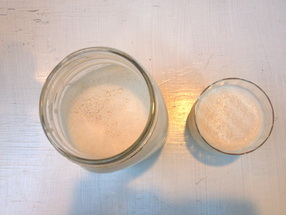
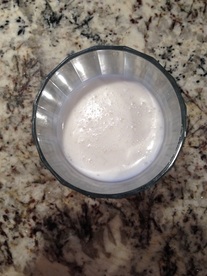
The purpose of refrigerating the coconut milk is to separate the thick coconut cream from the coconut water.  When you open the cans, scoop off the thick cream and place in a deep mixing bowl.  Save the coconut water if desired for use in other recipes, or discard.  Add vanilla extract and honey, and whip with an electric mixer for 4-5 minutes, or until thick.  Refrigerate to thicken even further; Coconut Whipped Cream keeps well in the fridge for a week.

A couple key points here to make this recipe a success:  First, don’t use light coconut milk – it doesn’t contain enough fat, which is what we need!  Also, I’ve found huge variation among different brands of coconut milk.  I recommend Thai Kitchen’s organic coconut milk, as it has been the most consistent in separating when refrigerated.

This pie was a hit!  I was so happy to be able to make a treat that dad could really enjoy, and to pass along to others wanting to make a nutritious and delicious apple pie.  Success!  I better start brainstorming now how I’m going to top this for dad’s milestone 65th birthday next year!  Any suggestions?  Please leave a comment, I’d love to hear your ideas!

--
Sources:
http://www.medicalnewstoday.com/articles/267290.php

1 Comment

Almonds, Coconuts, and Pumpkin Breakfast Porridge

12/1/2013

0 Comments

 
Picture Yes, it does taste as good as it looks!
My apologies, as I'm sure you have noticed, I have neglected my blog for the past few months.  For those who don't know, I have spent the last few years studying naturopathic medicine and this year I finished my program to become a naturopathic doctor!  Between graduation, licensing exams, moving back to the west coast, another exam, and working on getting my BC license, I've had my hands full.  But not to worry - while my hands have been full of books, papers, pens, acupuncture needles, and my stethoscope, they've also been full of plenty of good eats!  Now, while I am waiting for my BC license application to be processed, I figured it's a good time to catch up on sharing some of these good eats with you.

We're definitely in the season for warm breakfast foods, and this breakfast porridge recipe is out of this world.  But first, I have to tell you the story that led me to it!

PictureHomemade almond milk & beautiful flowers from my mom
I finally made my own almond milk, impressed with the result and happy to be able to finally check it off my bucket list.  It was way easier than I thought, and tasted amazing - it really made me wonder what I have been doing this whole time, drinking the store-bought stuff!  The ingredients are pure and simple, free of any added emulsifiers or stabilizers.  Having been dairy-free for years now, I'm always experimenting with new dairy-free products.  Lately, however, there has been some publicity about carrageenan, a food additive highly prevalent in many non-dairy milks and linked to intestinal inflammation and digestive complaints.  It's a tricky one to avoid, since most non-dairy milks do contain carrageenan for its thickening and stabilizing effects.  I have found one brand, Silk, which is carrageenan-free, however it is not organic.  If anyone has found an organic almond milk that does not contain carrageenan, please let me know.  For now, I'll keep alternating between Silk and making my own!

PictureCheck out that gorgeous foam with flecks of vanilla!
I'm addicted to Angela Liddon's vegan recipe blog, Oh She Glows.  So, it's not surprising to me that her recipe for My Favourite Almond Milk absolutely blew my mind.  It has a very fresh almond taste, with the natural sweetness of dates and flavours of cinnamon and vanilla.  I won't re-post her recipe here, but I highly encourage you to visit her blog and check it out for yourself. 

<-- For the record, here's a close-up of how mine turned out.

Feeling increasingly adventurous these days, I more recently made my own coconut milk, which is possibly even more simple than almond milk!  Less squeezing involved - I used a wire strainer and it worked just fine.  This creamy deliciousness closely rivalled my almond milk, and really it's up to your taste buds which one you prefer.  Here's the recipe:

Homemade Coconut Milk

4 cups hot water (not boiling)
2 cups unsweetened coconut flakes
1 teaspoon vanilla extract

In a blender, combine hot water, coconut flakes and vanilla and blend until smooth.  Filter out remaining chunks of coconut using a wire strainer (you can also use cheesecloth if desired).  Save the coconut pulp for making breakfast porridge (see below).  Drink coconut milk immediately or place in the fridge to enjoy a chilled beverage.
Picture
Picture
I was so impressed with how the coconut milk turned out, I just had to show you two views.
As you can see, homemade non-dairy milks are pretty easy to make.  Actually, the hardest part for me was figuring out what to do with the leftover pulp afterward.  For inspiration, I did a quick Google search which led me to a multitude of ideas, but the one that most stood out to me was the one that used another ingredient I currently have sitting in my fridge - leftover pumpkin!

Pumpkin Breakfast Porridge.  It makes me feel all warm inside just thinking about it.  As a bonus, not only is it gluten-free and dairy-free, it's Paelo too!  So really, anyone can eat it.. unless you have a nut allergy.  In that case, choose your ingredients accordingly!

The site I found used almond pulp, but since I had just made coconut milk, I decided to use my leftover coconut pulp instead.  Here's the link to the original recipe, and below is my rendition!
Picture
Just in case the first photo wasn't enough to get you excited!
Pumpkin Breakfast Porridge

Ingredients (1 serving):
1/2 cup canned pumpkin
2 heaping tablespoons coconut pulp (leftover from coconut milk - see above)
1 tablespoon ground flaxseed
1/3 cup almond milk (coconut milk would work well, too!)
1/4 teaspoon cinnamon
Pinch of sea salt
Pecans, chopped (or other nuts of choice)
Raisins (or other dried fruit of choice)
Additional coconut pulp for sprinkling

In a small pot, combine pumpkin, coconut pulp, ground flaxseed, half the almond milk, sea salt and cinnamon.  Stir continuously as the mixture heats up, and allow to cook for a few minutes.  Add remaining almond milk as desired.

Remove from stove and transfer to a small bowl.  Sprinkle with chopped pecans, raisins, and coconut pulp.  Serve hot and enjoy!

That's all for now - stay tuned until next time for a return to my Healthy Maple Granola, which has gotten such great reviews that I feel inspired to share how I like to use granola as part of a festive holiday breakfast!

-- 
Sources:
http://chriskresser.com/harmful-or-harmless-carrageenan
http://ohsheglows.com/2013/01/24/my-favourite-homemade-almond-milk-step-by-step-photos/
http://www.joyoushealth.ca/blog/2013/09/27/super-simple-homemade-coconut-milk/
http://www.choosingraw.com/almond-and-pumpkin-breakfast-porridge-gluten-free-grain-free-vegan/
0 Comments

Paleo Continues: The Best Chicken Ever

3/26/2013

0 Comments

 
My first day of being Paleo was a few weeks ago, and overall it's been a great experience.  So far I've dedicated the weekdays to being Paleo and allowed myself to be more relaxed on the weekends - like indulging in a small piece of dairy-free chocolate cake!  Aside from ensuring I am aware of consuming adequate carbohydrates during the week (see my previous post), I have found the Paleo diet to be one of the cleanest ways of eating that I have discovered to date, and I feel fantastic!

Today, I just have to share with you simply the best chicken recipe ever, which I've adapted from the book Delicious Detox by Carol Morley, ND.  It relies on heart-healthy almonds for its base, which are known to lower LDL ('bad') cholesterol, increase HDL ('good') cholesterol, and reduce the risk of heart disease.  Almonds are also an excellent non-dairy source of calcium, as well as being rich in vitamin E, magnesium, fibre, protein, and monounsaturated fats (the same health-promoting fats as in olive oil).  This chicken is easy to make, incredibly flavourful, lightly 'breaded' yet moist, and superbly healthy.  If that combination sounds good to you, you're in for a real treat!
PictureRosemary Almond Chicken with steamed broccoli and carrots
Rosemary Almond Chicken

Ingredients:
1/2 cup almonds
1 tablespoon dried rosemary
1 tablespoon dried oregano
1 tablespoon dried basil
1 tablespoon dried parsley
1 teaspoon freshly ground black pepper
1/2 teaspoon salt
2 chicken breasts
Olive oil

Preheat oven to 360°F, line a baking sheet with aluminum foil, and lightly grease with olive oil.
Grind the almonds and spices in a blender or Magic Bullet until they have reached a crumbly consistency, similar to that of breadcrumbs.

Picture
Ingredients for almond mixture, clockwise: Almonds, salt, pepper, parsley, rosemary, basil, oregano. Final almond mixture in centre.
Generously coat chicken breasts with almond mixture on both sides, and drizzle generously with olive oil.  Save leftover almond mixture in a glass container in the fridge.

Bake in oven for 15 minutes.  Flip chicken breasts, drizzle with a little more olive oil, and bake for 15 more minutes, or until cooked through.  Enjoy with steamed vegetables of your choice, and use any of the baked almond mixture left on the baking sheet as a sauce for the vegetables!

Bon Appétit!

--
Sources:
http://www.deliciousdetoxcookbook.com/
http://www.whfoods.com/genpage.php?tname=foodspice&dbid=20#nutritionalprofile
0 Comments

Carb it up, buttercup! - Day 2

3/12/2013

0 Comments

 
Although it usually takes an extreme diet to severely affect your metabolism, I have heard of some people feeling unwell while following this diet because they weren't consuming enough carbohydrates.  Remembering my colleague's promise that this is not a low-carb diet if done properly, and also wanting to prevent hypoglycemia, I loaded up on root vegetables at dinner tonight.

The first half of the day's meals weren't too remarkable, aside from adding shredded coconut and sunflower seeds to my mixed fruit at breakfast, and as promised, leftover frittata for lunch - see yesterday's post for the recipe!

Then, working in my office toward the end of a long day, my body was asking for an early dinner (5pm is early for me!).  Although my original goal was to do all this Paleo cooking myself, as a busy clinic intern, you often have to adapt.  So, the special in our delicious CCNM cafeteria today?  'Gourmet Poutine'; which isn't really poutine at all, but rather a hearty and nutritious dish of roasted yams, sweet potatoes and beets, spinach, mushrooms, onions, salsa, homemade hot sauce, vegan gravy and a side of kale salad - I can feel my salivary glands perking up at the sheer memory of it!
Picture'Gourmet Poutine' - in a box!
This dish is a perfect example of how to follow the Paleo Diet while ensuring you are consuming sufficient carbohydrates.  Root vegetables such as the ones featured in this dish are rich in complex (slow-digesting) carbohydrates as well as high quality fibre.  Yams and sweet potatoes have the added bonus of being rich sources of beta-carotene (plant source of vitamin A), while beets earn their nutritional stars from pigments called betalains, which give them their deep red colour.  Betalains are known for their antioxidant, anti-inflammatory, and liver detoxification properties.  Turnip, rutabaga, parsnips, radishes, celeriac and all varieties of squash are additional sources of paleo-friendly carbohydrates.

Picture
I had to share this picture because it made me laugh - the compostable to-go container is nearly the same size and shape as my MacBook.  Yes, I admit that I was multitasking over dinner; not the best habit, but at least I had carbohydrates to fuel my brain!

Until next time, stay tuned for the next chapter in my cavewoman adventure!

--
Sources:
http://www.whfoods.com/genpage.php?tname=foodspice&dbid=49
http://www.drweil.com/drw/u/RCP00221/roasted-root-vegetables.html

0 Comments

My Cavewoman Adventure: Day 1

3/11/2013

0 Comments

 
Today was the first day of my ‘Cavewoman Adventure’, so to speak.  In my previous post, I discussed the potential benefits of following a Paleo Diet, and while I have been mindful of the diet’s principles, I’ve decided it’s time to go for it 100% and see what happens!  A large part of my motivation comes from the fact that several of my colleagues are doing it as well – and what better kind of motivation to keep on track than having others for support?  Our group’s goal is 4 days, and depending how it goes, I’m hoping to last longer than that!  As I snack on plantain chips and trail mix, let me tell you about my first day as a pseudo-cavewoman!

Breakfast

Breakfast wasn’t too out of the ordinary.  In my usual bowl of mixed fruit, nuts and almond milk, I replaced my homemade granola with – you guessed it – more nuts and more fruit.  Not a bad start!  Together with a cup of green tea, I was well fueled for my morning class and dance rehearsal, and wasn’t hungry until lunchtime.

Lunch

This was my big protein-dense meal – chicken breast (skin on!) with mixed greens, chopped avocado and tomatoes, and flax oil dressing.  Mmm, mmm.  If you’ve ever had the organic chicken from Hearty Catering (the cafeteria at CCNM), then you know what I’m talking about!

Afternoon Snack

I attended a MediHerb lecture this afternoon, and lucky for me I was able to navigate the food offerings to make a substantial Paleo-friendly plate of snacks.  A mandarin orange, mixed berries, and a handful of cashews were enough to keep my energy up throughout the afternoon.
Picture
Dinner

For dinner, I made one of my favourite dishes which I make all the time – Fritatta!  This recipe is so good, I just have to share – see below!  You can think of this as basically a crust-less quiche (and in my case, cheese-less also!).  I pack it full of veggies and healthy fats, and hold it all together with free range omega-3 eggs.  I made it in my large stainless steel pan, so I have leftovers for lunch tomorrow.  Trust me, this is one of those things that tastes so good the next day, you’ll be happy to eat it cold!


Evening Snack

Tonight I’m babysitting my two-year-old ‘niece’ (my friend’s daughter), and while she’s sleeping, I’m catching up on work and enjoying the snacks her parents left for me.  Somehow, all these snacks are paleo-friendly – how did they know?!  There’s a sizeable bowl of almonds, pistachios, and plantain chips, with dried prunes on the side.  Together with my peppermint tea, I’m feeling pretty content at the end of Day 1 of my Cavewoman Adventure.  I’m excited to see – and taste – what tomorrow will bring to my plate!

Scarlett’s Frittata

½ tablespoon coconut oil
½ onion
3 large collard leaves
1 roma tomato
1 ½ cups zucchini, chopped
A dozen black olives (optional)
5 eggs
Dash of salt
Generous amount of freshly ground black pepper
As much cayenne as your spice tolerance will allow!
Drizzle of olive oil or flax oil

Preheat the oven to 400°F on broil setting. 
Chop vegetables into bite-sized pieces. 
Melt coconut oil in a large stainless steel frying pan over medium heat.  Add vegetables, and lightly sauté. 
Add eggs and spices, and mix well to combine.  Allow to cook without stirring on low-medium heat until mostly done; then put pan in the oven to allow the top to cook.
Once the top is firm (no uncooked egg visible), your frittata is ready!  Cut into slices and serve warm with a drizzle of olive oil or flax oil on top, and save the leftovers for tomorrow’s lunch.
Enjoy!

0 Comments

Medicinal Properties of Oats

6/27/2012

0 Comments

 
PictureBreakfast cookies, ready to enjoy with a mug of tea
Eating on the go is an inevitable part of a busy lifestyle, but doing so healthily shouldn’t be impossible!  That’s why my mom and I came up with this healthy breakfast recipe back when I was in high school, so I could continue to eat well amidst my busy schedule of school, dance, and commuting between the two.  We called them ‘Breakfast Cookies’, as they are essentially the contents of a bowl of oatmeal in cookie form, for a quick and easy breakfast!  Unlike a traditional ‘cookie’, however, they are free from any added sugar or fat; their natural sweetness comes from raisins and spices, and their moisture comes from applesauce.

This recipe features oats, which have medicinal properties as a food as well as in their botanical form.  When consumed as a food, oats are rich in fibre, manganese, selenium, phosphorus, magnesium, and zinc.  They are useful in balancing blood glucose levels, decreasing the risk of Type 2 Diabetes, lowering cholesterol levels, and overall improving cardiovascular health.

Botanically known as Avena sativa, oats are a true nutritive for the nervous system.  When given as a botanical tincture, oats have mild anti-depressant properties, and are also indicated for nervous exhaustion, anxiety and insomnia.

PictureAn oat field in Farmington, California
Oats are also extremely nourishing and moisturizing to the skin when applied topically, and can be used for many conditions including inflammation, eczema, acne, dry and irritated skin.  My favourite is an oatmeal face mask: simply grind a couple tablespoons of oats in the blender and mix in a small bowl with enough warm water to form a thin paste.  Massage gently into skin and allow to dry.  Rinse off after 20-30 minutes.

But since eating oats is the most fun, see the recipe below!

Scarlett’s Breakfast Cookies

First, preheat the oven to 350°F.  Then, mix together in a large bowl:

1 1/3 cups of whole rolled oats
2/3 cup rolled oats, ground into flour in the blender
½ cup raisins (or other dried fruit)
2/3 cup walnuts (or other nuts/seeds)
¼ cup unsweetened shredded coconut (optional)
1 ½ cups applesauce
¾ tsp baking soda
1 tsp cinnamon
½ tsp ginger
¼ tsp nutmeg
¼ tsp allspice
1/8 tsp cloves

Cover a baking sheet with parchment paper and place cookie batter in small flattened mounds, an inch or so apart, to make 18 cookies.  Bake for 15-17 minutes, then allow to cool on a wire rack.  These cookies can be eaten immediately, or stored in the fridge for up to a week.  Enjoy for breakfast or as a snack anytime!

--
Sources:
http://www.flickr.com/photos/mhall209/2530281404/
http://www.whfoods.com/genpage.php?tname=foodspice&dbid=54

0 Comments

Spicy Dahl Recipe

6/15/2012

0 Comments

 
PictureTurmeric in three forms: the whole root, ground, and powdered
To put theory to practice, here's my straightforward and delicious recipe for dahl.  It features red lentils, a small quick-cooking legume that softens and forms a thick stew-like mixture when combined with vegetables and spices.  Red lentils are a rich source of protein, fibre, B vitamins such as folate and thiamin, and minerals such as iron, molybdenum, manganese, phosphorus, potassium and copper.  When combined with a grain such as quinoa or rice, this combination forms a complete protein source.

This recipe also features turmeric (Curcuma longa), a relative of ginger that is widely recognized for its anti-inflammatory properties. 

Turmeric is associated with a myriad of health benefits, including protection against liver damage, anti-cancer effects, and reduction of inflammation in arthritis.  Dr Andrew Weil, MD, founder and director of the Arizona Center for Integrative Medicine, is a proponent of using turmeric abundantly in cooking.  He also points out the research showing that turmeric is much better absorbed when combined with black pepper.  For the recipe below, at least 1-2 tsp of turmeric and 1-2 tsp of freshly ground pepper is recommended.  The rest of the spices can be added to taste.  Enjoy!

Scarlett's Spicy Dahl

Bring to a boil 1 cup red lentils and 3 cups water, then reduce heat to simmer.  Stir occasionally – they’ll thicken up as they cook. In a separate pot, bring to a boil 1 cup quinoa and 2 ½ cups water, then reduce heat to simmer.

In a frying pan, sauté a variety of vegetables in olive oil or coconut oil: Onions, red pepper, green pepper, leeks (the green and white parts!), zucchini, green peas, celery, garlic

Then add spices to taste:
Turmeric (1-2 tsp)
Cayenne
Coriander
Chili pepper flakes
Cumin (ground and whole seeds)
Salt
Pepper (1-2 tsp; freshly ground is best)

Once the lentils have thickened up, add the veggies to the lentils and see how it tastes.  At this point, you can definitely add more spices – I also like to add a little more olive oil at the end for more flavour.
Serve dahl over a bed of quinoa (or rice!)

--
Sources:
http://www.huffingtonpost.com/andrew-weil-md/turmeric-health-have-a-happy-new-year_b_798328.html
http://whfoods.org/genpage.php?tname=foodspice&dbid=52
http://www.flickr.com/photos/fotoosvanrobin/3825527595/

0 Comments

Preparation Tips for Beans

6/14/2012

0 Comments

 
Picture
As promised, in an effort to decrease consumption of canned foods (see my previous post on BPA in Canned Food), this week I'll give some guidance on how to cook beans from scratch!

The First Step - Measuring
Dried beans yield approximately 3 times the amount once cooked.  So, 1 cup of dried beans = 3 cups cooked beans.

The Next Step - Soaking
After rinsing, soak beans overnight in a glass jar containing 3 times their volume of cold water.  In the morning, drain the beans and put them in your favourite cooking pot with the same amount of fresh water.

The Next Next Step - Cooking
Choose your favourite bean from the chart below to determine their cooking time.  Bring water and beans to a boil, then reduce to a simmer.  Allow to cook until soft and easily mashed, then drain the beans.

The Final Step - Eating
From hearty chili to summer bean salad, there are countless ways to enjoy cooked beans!  In my next post, I'll share with you one of my favourite original recipes using red lentils:  Scarlett's Spicy Dahl

Picture
Picture
--
Sources:
http://whatscookingamerica.net/Vegetables/driedbeantip.htm
http://www.flickr.com/photos/sifu_renka/3982690279/
0 Comments

    Author

    Dr. Cooper is a licensed Naturopathic Doctor in British Columbia and has a general family practice in Surrey and Squamish.

    Archives

    October 2017
    September 2016
    August 2016
    May 2016
    November 2015
    September 2015
    August 2015
    June 2015
    May 2015
    April 2015
    March 2015
    February 2015
    January 2015
    December 2014
    December 2013
    May 2013
    March 2013
    February 2013
    December 2012
    October 2012
    September 2012
    August 2012
    July 2012
    June 2012

    Categories

    All
    Allergies
    Antioxidant
    Breakfast
    Budget Tips
    Cancer
    Dairy Free
    Dessert
    Digestive Health
    Food Prep Tips
    Gluten Free
    Local
    Lunch/Dinner
    Naturopathic Medicine
    Organic
    Paleo
    Pediatrics
    Seasonal
    Sugar Free
    Vegan
    Vegetarian

    RSS Feed

Island Integrative Health
104 Front Street, Nanaimo BC, V9R 5H7

250-754-0887
[email protected]